Overview
Destination Type: and- Includes support for
- Includes support for
Installation instructions
- Navigate to your GA4 Property and choose > Data collection and modification > Data streams.
- If you do not have a data stream yet, you should click Add stream > Web. If you do have a data stream already, you should click on the datastream.
- Copy the Measurement ID from the top right corner. You will need it later.
-
Click on Measurement Protocol API secrets on the same page.
If you do not see the Measurement Protocol API secrets option, this means that you do not have
Editpermissions for this GA4 Property. - Click on Create to generate a new secret, and give it the name Converge. After creating, copy the Secret value.
- In the Converge sidebar, click on and then click Create new Destination.
- Select the Google Analytics 4 destination and click Next.
- Give your destination a name (e.g. GA4 Destination) and click Next.
- Fill in the Measurement ID and Measurement Protocol API Secret you copied from GA4 and click Next.
- Keep the defaults on the Configuration page and click Next.
- Select Use default mapping and click Next.
- Select the sources you want to forward events from, then click Next.
- Review any issues and click Submit.
Turn off your old GA4 tracking
Turning off the Shopify Google Sales Channel data sharing
- Navigate to your .
- Click on Sales channels and choose Google & YouTube from the Installed sales channels menu.
-
Click the Google Analytics tab. Then click the … menu and select Manage settings.
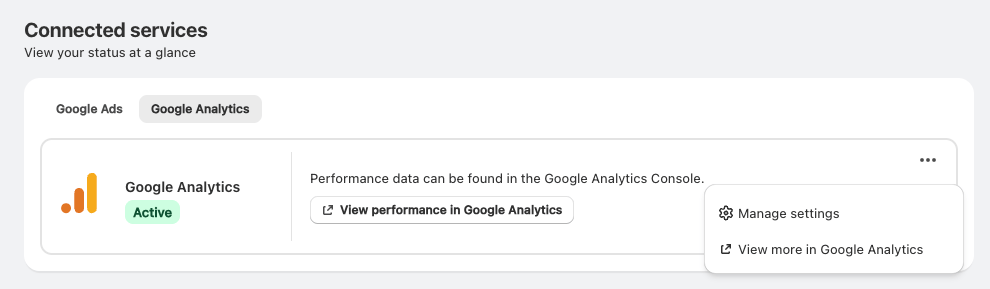
-
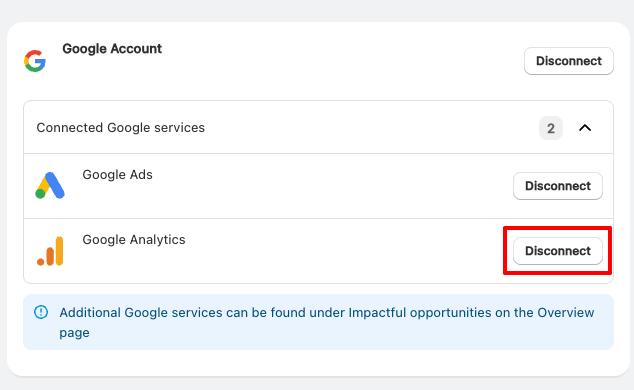
Click Disconnect next to Google Analytics.
Configuration Options
The following options can be configured in the Destination Configuration.Modify your Content ID
The Converge GA4 Destination will use the Default content mode to define the Content ID forwarded by default. However, you can configure the destination to use explicitly the Product ID, the Variant ID or SKU instead.- Navigate to your GA4 Destination, click on Configuration.
- Click on the Configuration-subtab
- Open the Advanced configuration (optional) section
- Pick your desired Content ID, and click on Save
Connection Type
How Converge forwards events to Google Analytics 4. Options include:- Client-side: loads the
gtagand sends every Converge event client-side. - Server-side: loads the
gtagand sends every Converge event (except for$page_load) server-side through the Measurement Protocol. - Server-side GTM (Recommended): loads the
gtagin a server-side GTM container, and sends server-side conversions through the Measurement Protocol.
Custom Events
The GA4 destination supports setting up custom events, see here for a deep-dive. When the (recommended) sGTM mode is selected, there are two additional configuration options for each custom event:- Client or Server. Configure where the custom event is sent from. By default, custom events are triggered from the browser. In some cases, you may want to trigger the event from the server instead. This is useful for events that are exclusively sent server-side to Converge.
- Event or Conversion. Choose whether the custom event should be marked as a conversion in GA4.
Custom Event Properties
Converge allows you to map properties that were tracked on a source from Converge into a custom property in Google Analytics 4.Forward a custom event property to GA4
Forward a custom event property to GA4
We do not allow nested event properties to be forwarded as a custom property.
Expand for more information
Expand for more information
I.e. if the event properties look like this:then we do support forwarding
property_1 as a custom property, but we do not support forwarding property_2.1
Set up the forwarding rule in Converge
- Navigate to the , and click on the GA4 Destination.
- Navigate to the Configuration > Advanced sub-tab, and click on Edit Configuration.
- Click on
-
Choose the mapping from the Converge property to the desired GA4 property.

2
Set up a custom definition in GA4
-
Navigate to your Google Analytics Property and click on >
- Click on Create custom dimension.
-
Fill in your desired Dimension name (this is how your dimension/property will show up in GA4), and choose Event as your Scope. Optionally add a description and choose the mapped property that you set up in Step 4 to fill in Event parameter.
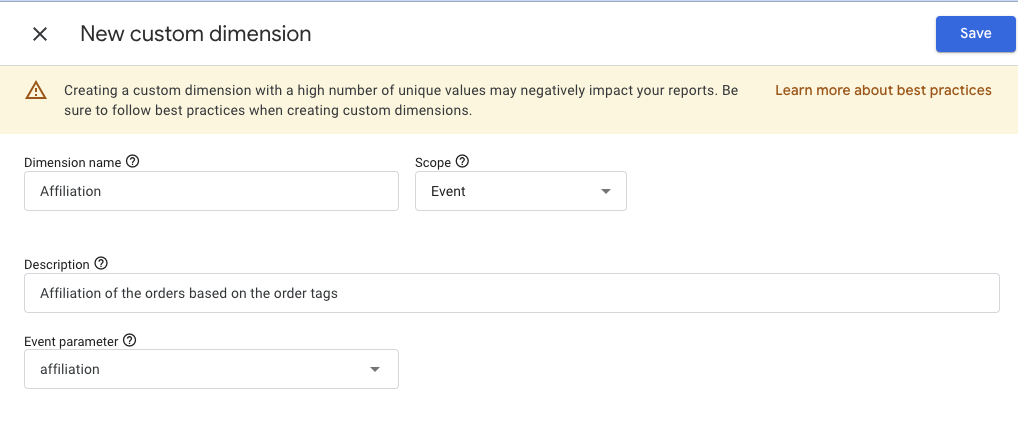
- Press Save
Custom Ecommerce Properties
You might want to add a custom property on theitems array for ecommerce events as per the GA4 documentation here.
For example, you could include a custom in_stock parameter on all of the item arrays in your GA4 Ecommerce events.
The steps for setting up these custom properties are functionally similar to the steps described above in the Custom Event Properties-paragraph.
The only distinction is that you should choose an item-scoped custom dimension in the GA4 settings.
Custom User Properties
You might want to forward a profile property as a custom user property. The steps for setting up these custom properties are functionally similar to the steps described above in the Custom Event Properties-paragraph. The only distinction is that you should choose auser-scoped custom dimension in the GA4 settings.
Deploy a separate data layer for Converge
When enabled, Converge creates a newdataLayer object, even if there is already an existing dataLayer object. This makes sure that any existing implementation does not accidentally push events on the dataLayer object that Converge uses to forward events to its destinations.
When you use the sGTM connection type, Converge will always use a separate data layer.
Pass consent parameters on server-side events
When enabled, Converge makes sure to inject the Google Consent Parameters on server-side captured events as per the corresponding browser session.Cross-Domain tracking
If you need to track users across multiple domains you will need to set up cross-domain tracking in GA4.- Go to your GA4 property.
- Go to Admin.
- Go to Data streams.
- Select your active data stream(s).
- Click Configure tag settings.
- Under Settings click Configure your domains.
- Add the different domains the user will interact with.
- Click Save.
If you also want cross-domain tracking in Converge. You can follow these instructions.
Converge functionality
This integration supports the following Converge destination functionality.FAQ
Why do I see a lot of events with a Skipped status in the Destination Log?
Why do I see a lot of events with a Skipped status in the Destination Log?
Google Analytics 4 does not natively deduplicate events that are being sent from both the server and the browser.As such, the Converge destination will automatically not forward the server copy of the event and only send the browser copy of the event.These server-side copies will show up with a
Skipped status in the Destination Log. However, the event will still arrive in GA4 through the browser-side copy.Why do I see a discrepancy between purchases in GA4 and Placed Orders in Converge?
Why do I see a discrepancy between purchases in GA4 and Placed Orders in Converge?
If you see a discrepancy, check the following:
- Make sure that your GA4 property and your Converge dashboard are in the same time zone. There might be a difference due to timezone misalignment.
- Verify that you have no active that are filtering out certain purchases. You can check this in the .
- Make sure that you configured the connection type for this destination to be sGTM or server-side. If you’re only tracking client-side, then your purchases might not get tracked due to ad blockers and tag-loading issues.
- Verify that you’ve disabled “Collect automatically detected user-provided data” under > .
- If your cookie banner informs Converge that the user hasn’t given consent, then Converge will pass this
deniedconsent parameter to GA4 and GA4 will drop this purchase. You can verify whether this is the case by inspecting the GA4 Destination Logs for thePlaced Orderevents. If you find adeniedconsent parameter under the profile properties, it means that your cookie banner passed adeniedstatus for these purchases.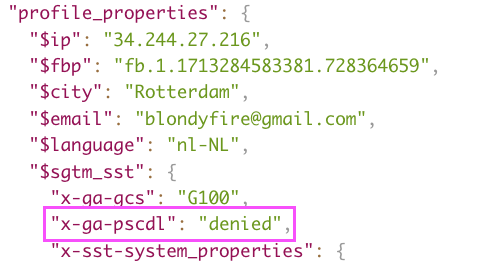
How to configure cross-domain tracking in GA4?
How to configure cross-domain tracking in GA4?
If your customer journey goes through multiple domains (e.g. landing pages or checkout on a different domain), it is important to configure this in GA4 to avoid broken customer journey reports.You can configure cross-domain tracking through the following steps:
- Go to > Data collection and modification > Data streams.
- Select your data stream > Configure tag settings > Configure your domains.
- You have now arrived at the Cross-domain Linking Configuration. In some cases, GA4 will already provide you with some suggestions. If not, then you can add your domains by adding a condition. When setting up a condition, make sure that you use the Contains match type.
- Save your changes.
Why do I see redundant "Viewed Product" and "Added Product"-events arriving in my GA4 property?
Why do I see redundant "Viewed Product" and "Added Product"-events arriving in my GA4 property?
This is most likely a legacy Universal Analytics property/pixel that is streaming events into your new GA4 property.
-
Navigate into your old Universal Analytics Property (usually you can do this by clicking on your GA4 property and then choosing the property whose property ID starts with
UA-)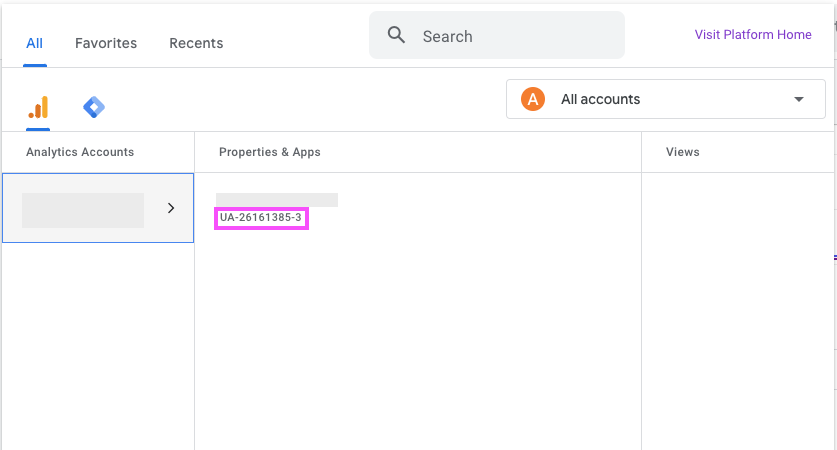
-
Click on Admin > GA4 Setup Assistant.
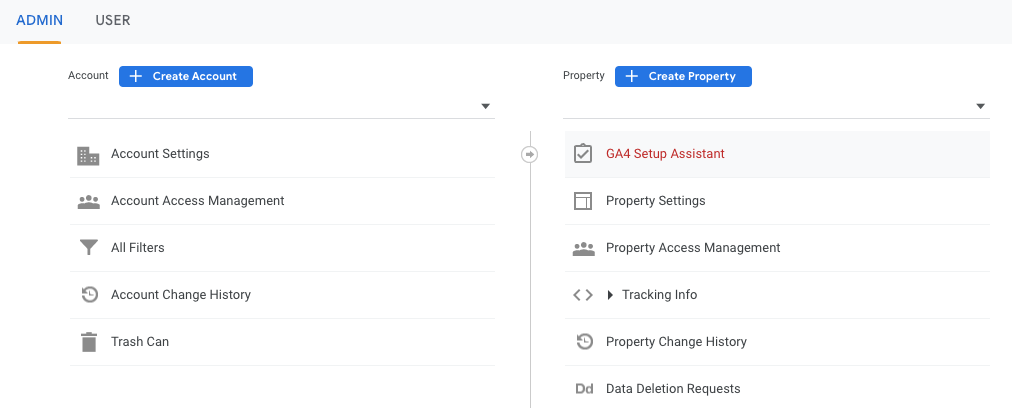
- Make sure that your Google Analytics 4 property is not connected.
Does Converge support the GA4 user ID feature?
Does Converge support the GA4 user ID feature?
Converge does not integrate with the GA4 user ID. This is a conscious decision because it leads to downstream data accuracy issues.Capturing the GA4 user ID limits the number of anonymous sessions captured for a customer to one. Therefore, it doesn’t make sense to capture this in a marketing attribution context where as much anonymous activity as possible should be captured.For example, when an entirely new visitor visits your website, the following activity could be captured:
- They land on your website after clicking on a Facebook ad.
- Later in the day, they search Google for your product.
- They place a purchase, and the user ID is captured.