Overview
Destination Type: and
Installation instructions
-
Navigate to your . If the direct link does not open your Events Manager, you can access it from the Pinterest Ads Manager dashboard under Tools > Events.
-
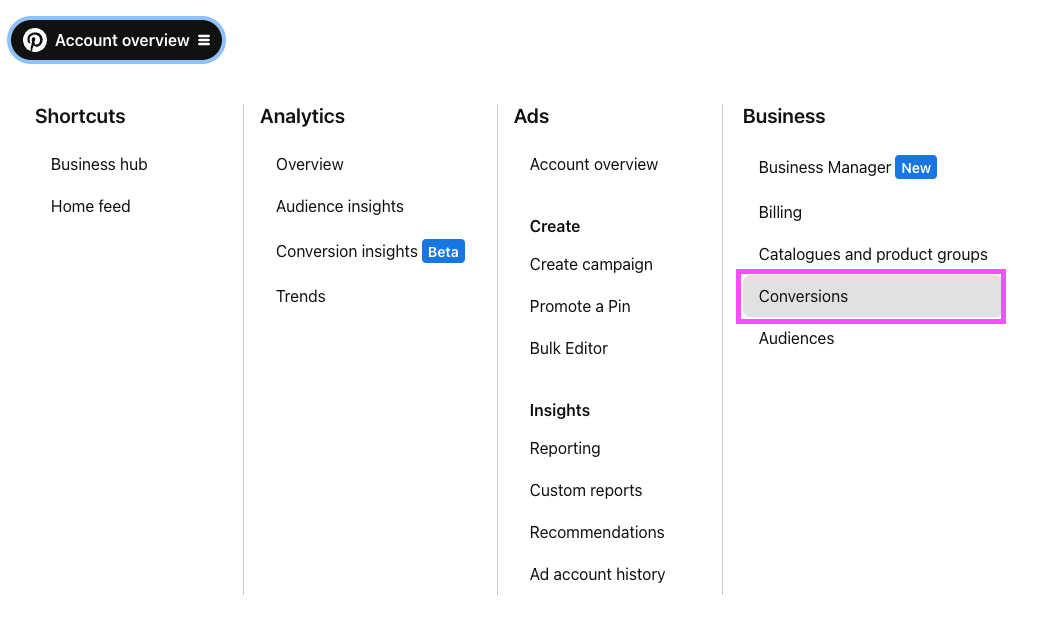
From your Ads Manager click on in the top left corner.
-
Click on Conversions under the Business section.
-
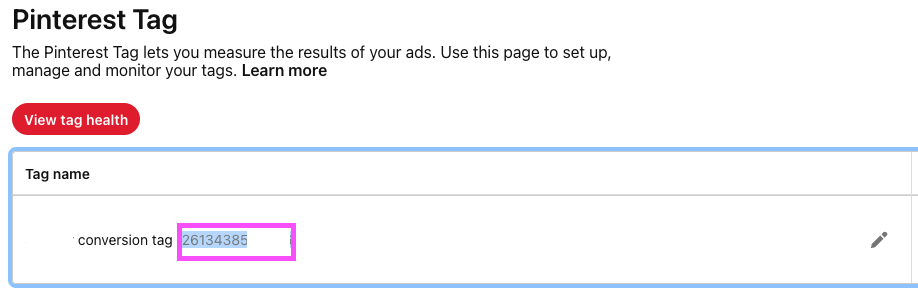
Navigate to the Pinterest Tag > Tag Manager tab and copy your Tag ID, you will need it later. Create a tag if you do not have one.
-
Lastly, get your Ad Account ID, you can find it in the URL of the ad manager. It consists of 12 numbers.
-
Navigate to the API for conversions > Conversion access token tab. Click on Generate new token and copy the token, you will need it later.
-
In the Converge sidebar, click on and then click Create new Destination.
-
Select the Pinterest destination and click Next.
-
Give your destination a name (e.g. Pinterest Destination) and click Next.
-
Fill in the Ad Account ID, Tag ID and Access Token you copied from Pinterest and click Next.
-
Select Use default mapping and click Next.
You can find the Default mapping for the Pinterest destination
here. For more information on setting up Custom mappings, look
here.
-
Select the sources you want to forward events from, then click Next.
-
Review any issues and click Submit.
Set this destination to Deactivated while you remove your existing Pinterest tracking setup. Running both in parallel leads to duplicate conversion data. Follow the Turn off your old Pinterest tracking instructions below, then set the destination to Active when you’re ready.
Turn off your old Pinterest tracking
Turning off the Shopify Pinterest Ads Sales Channel
The Pinterest Ads app for Shopify does not support disabling tracking without uninstalling the app. Uninstalling also stops your product sync to Pinterest. Before you continue, switch to a third-party feed manager as described .
-
Navigate to your .
-
Click on Sales channels and choose Pinterest from the Installed sales channels menu.
-
Click on the menu icon in the top right, and click on Uninstall.
-
Confirm by clicking Uninstall.
Modify your Content ID
The Converge Pinterest Destination will use the Product ID by default.
However, you can configure the destination to use explicitly the Variant ID or SKU instead.
- Navigate to your Pinterest Destination, click on Configuration.
- Click on the Configuration-subtab
- Open the Advanced configuration (optional) section
- Pick your desired Content ID, and click on Save
List of available Content ID Modes
| Content ID Mode | Behavior |
|---|
| Product Id | Always use the product_id |
| Variant Id | Always use the variant_id |
| SKU | Always use the sku |
Converge functionality
This integration supports the following Converge destination functionality.
| Converge Feature | Supported |
|---|
| Custom Events | |
| Filters | |
| Server-side Conversions | |
| Conversion amount | |
Event mapping
Converge automatically maps the following events from the Converge event spec to the Pinterest Ads spec.
| Converge Event Name | Pinterest Ads Event Name |
|---|
| $page_load | page |
| Viewed Product | page_visit |
| Viewed Collection | view_category |
| Added To Cart | add_to_cart |
| Searched | search |
| Subscribed To Newsletter | lead |
| Placed Order | checkout |