Overview
Destination Type: and
Installation instructions
-
Navigate to your Snapchat Ads > Events Manager (under assets).
-
From your Events Manager, click on the Snapchat Pixel you would like to connect or create a new one through ‘New Event Source’.
-
Under the name of the pixel, you can find the Pixel ID, copy it and save it for later.
-
Go to the business dashboard > Business details > Conversions API tokens. Click the ‘Generate Token’ button and copy the new API token and save it for later.
-
In the Converge sidebar, click on and then click Create new Destination.
-
Select the Snapchat destination and click Next.
-
Give your destination a name (e.g. Snapchat Destination) and click Next.
-
Fill in the Pixel ID and API Token you copied from Snapchat and click Next.
-
Enter the main URL of your website. Be sure to include the https:// prefix as well. Then click Next.
-
Select Use default mapping and click Next.
You can find the Default mapping for the Snapchat destination
here. For more information on setting up Custom mappings, look
here.
-
Select the sources you want to forward events from, then click Next.
-
Review any issues and click Submit.
Set this destination to Deactivated while you remove your existing Snapchat tracking setup. Running both in parallel leads to duplicate conversion data. Follow the Turn off your old Snapchat tracking instructions below, then set the destination to Active when you’re ready.
Turn off your old Snapchat tracking
Turning off the Shopify Snapchat Ads Sales Channel data sharing
-
Navigate to your .
-
Click on Sales channels and choose Snapchat Ads from the Installed sales channels menu.
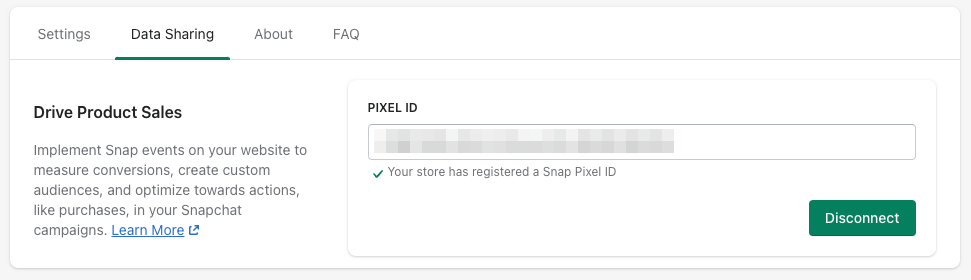
-
Click on Data Sharing, and finally click on Disconnect.
Modify your Content ID
The Converge Snapchat Destination will use the Default content mode to define the Content ID forwarded by default.
However, you can configure the destination to use explicitly the Product ID, the Variant ID or SKU instead.
- Navigate to your Snapchat Destination, click on Configuration.
- Click on the Configuration-subtab
- Open the Advanced configuration (optional) section
- Pick your desired Content ID, and click on Save
List of Content ID Modes
Converge functionality
This integration supports the following Converge destination functionality.
Snapchat does not support multiple pixels on the same website. Installing multiple Snapchat destinations will lead to duplicate tracking.
Event mapping
Converge automatically maps the following events from the Converge event spec to the Snapchat spec.
Snapchat only supports up to 5 custom events, and they must be named exactly CUSTOM_EVENT_1, CUSTOM_EVENT_2, CUSTOM_EVENT_3, CUSTOM_EVENT_4, or CUSTOM_EVENT_5. Any other name (e.g. custom_event_1, CustomEvent1, or a descriptive name like QUIZ_COMPLETED) will cause events to fail and be rejected by Snapchat.